Reporter:
The reporter creates intuitive reports for security specialists, department managers, HR managers, and network administrators who need visibility into all Web-related user activity.
Symantec Reporter provides scalable log collection and storage as an appliance or virtual appliance for several Symantec products:
- ProxySG
- Advanced Secure Gateway
- Web Security Service
- Content Analysis
- Reverse Proxy
- Web Application Firewall deployments of ProxySG
Symantec Reporter is a key component in the Secure Web Gateway solution. The reporter generates and displays reports that are based on web traffic access log data. Analyzing reports gives insight into the integrity of the network and user web browsing habits and policy compliance.
The reports allow you to:
- Identify possible security threats (such as malware/spyware).
- View user activity by user, group, URLs, or another aspect.
- View blocked web traffic (such as categories and URLs).
- Identify which users consume how much network bandwidth from web use.
Prerequisites:
- Symantec Reporter v11 supports ESXi 6.7 and ESXi 6.0 and 6.5.
- Management Center version 3.1.x and later.
- (RPAC) 1.
Steps:
1. Install Reporter software
- Access the VMware client interface.
- Install the OVF image.
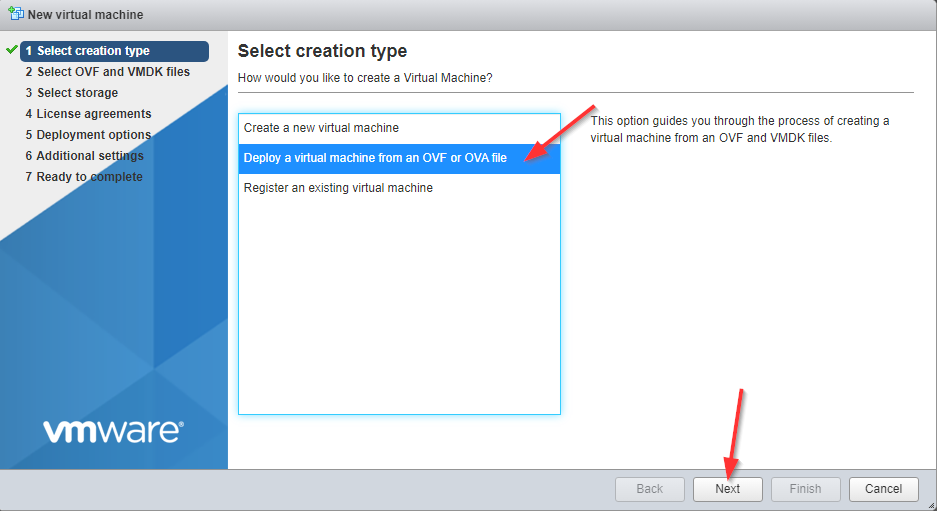
- Select File > Deploy OVF Template.
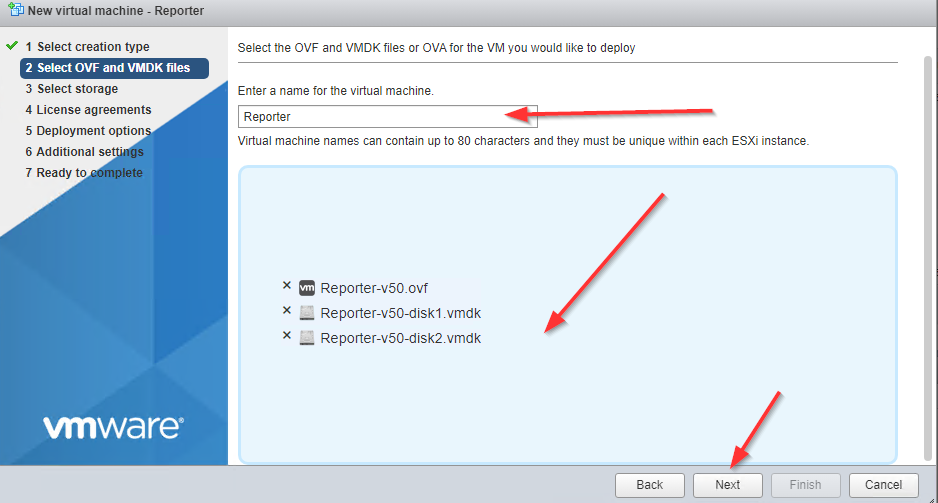
- Navigate to and select the OVF and vmdk images obtained from the Symantec support site.
Note: When deploying the OVF onto an ESXi server use thick provisioning; avoid using thin provisioning. - Click Next and install the image.
- Power on the Reporter VA.
- When the Reporter is ready, you should see Please enter the serial number: in the console. Enter the serial number provided by Symantec.
- Press Enter three times to enter an installation mode.
- Perform the initial configuration.
- At the CLI option prompt, enter 2 (Setup console).
Press any key, and then enter the network information for your VA, for example, IP address, Netmask, Gateway, and DNS server, To enter multiple DNS servers, separate the addresses with a space. - Confirm the settings at the prompt.
- Set the console password, which is used to access the Reporter CLI with the username admin.
- Set the enable password, which is used to access enable- and config-mode commands in the CLI.
- Press any key and then press Enter three times to activate the serial console.
- At the CLI option prompt, enter 2 (Setup console).
2. Add Reporter License
- SSH to the Reporter to open CLI
- Enter Enable mode
- Use the following commands to deploy the License:
reporter# licensing inline license-key passphrase (write pass passphrase value)
Copy and paste the License value - CTRL+D
3. Add Reporter to Management Center
- From Network> Add > Reporter
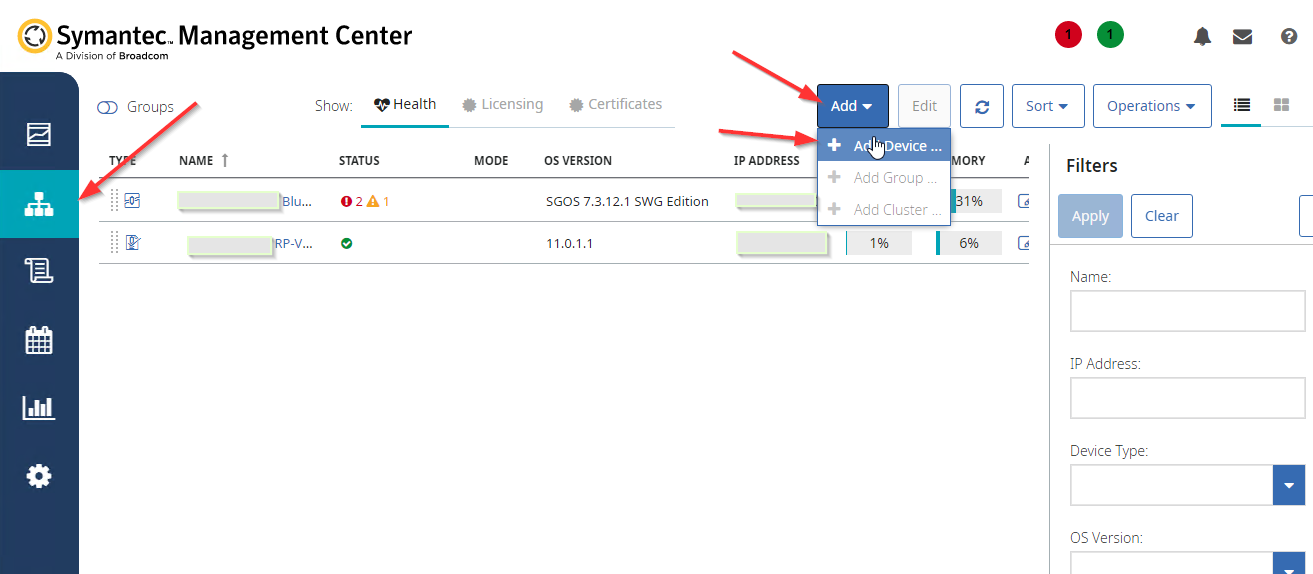
- Enter Reporter values
Note: In Role add (_admin) as a value - Add the Reporter RPAC packages to Launch the Reporter Admin Console.
- From Administration> Packages> Add Package
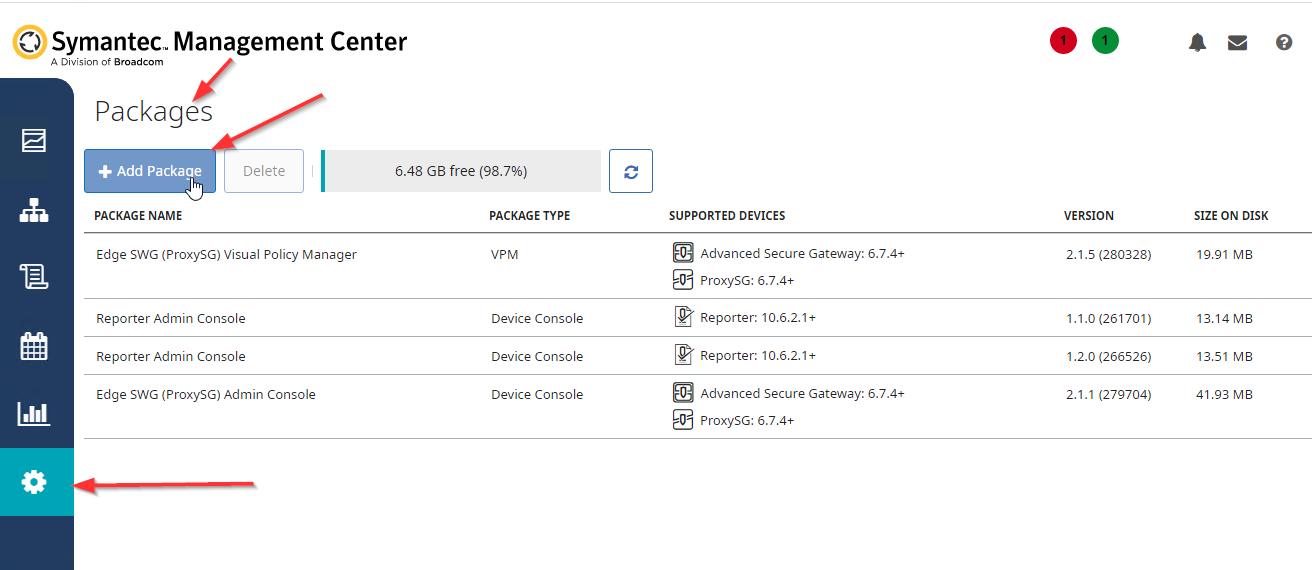
- From Administration> Packages> Add Package
- After uploading the Package to launch the Reporter Admin Console
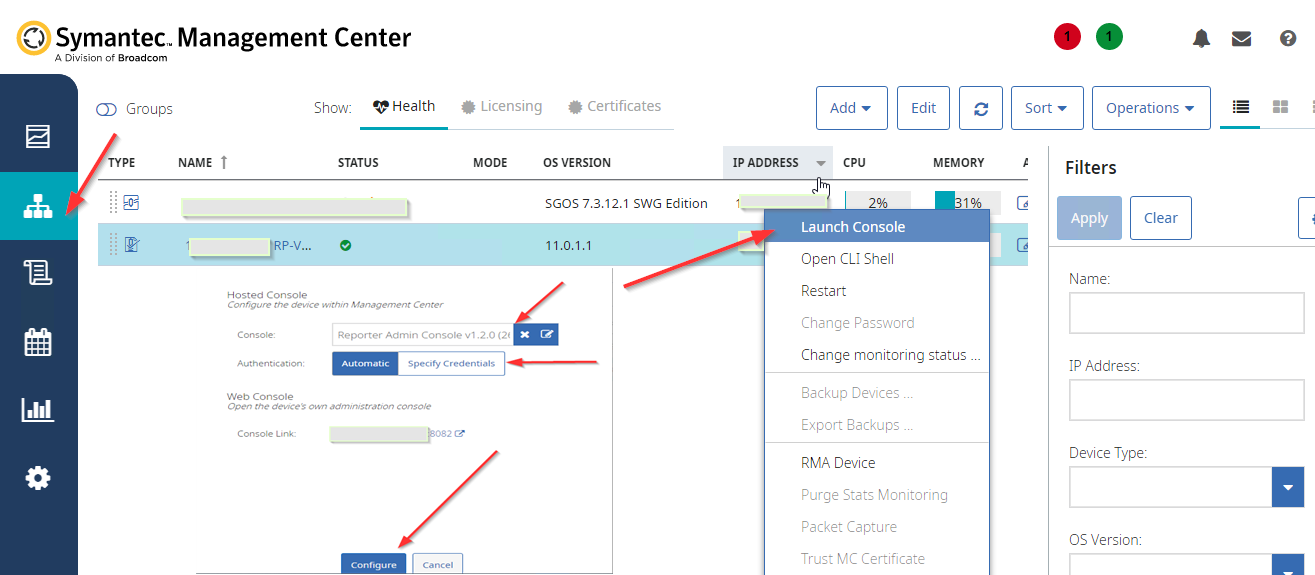
- In Management Center, select the Network tab.
- In the left pane, select the reporter device that you want to access.
- From the Operations drop-down list, click Launch Console. Or Click the device link to edit the device, select Operations >Launch Console, Or Right-click the device and click Launch Console.
- Select an RPAC version from the list of available RPAC packages
- Log into the device. Choose the authentication method—Automatic or Manual (Specify Credentials).
- Click Configure
4. Use Reporter with ProxySG
We will enable the FTP server on the Reporter so before that we should create a new user instead of an admin to enable it.
Launch the Reporter Console:
To create a new user
- From Administration> Access> Access Control
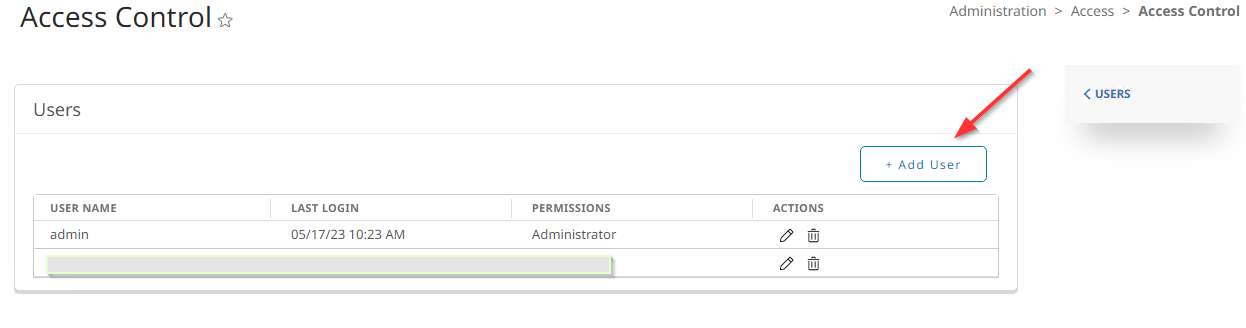
- Create Local and Admin Users>Add User
- Complete user information then save
Note: Don’t select administration privilege for this user
- From Administration> Access> Access Control
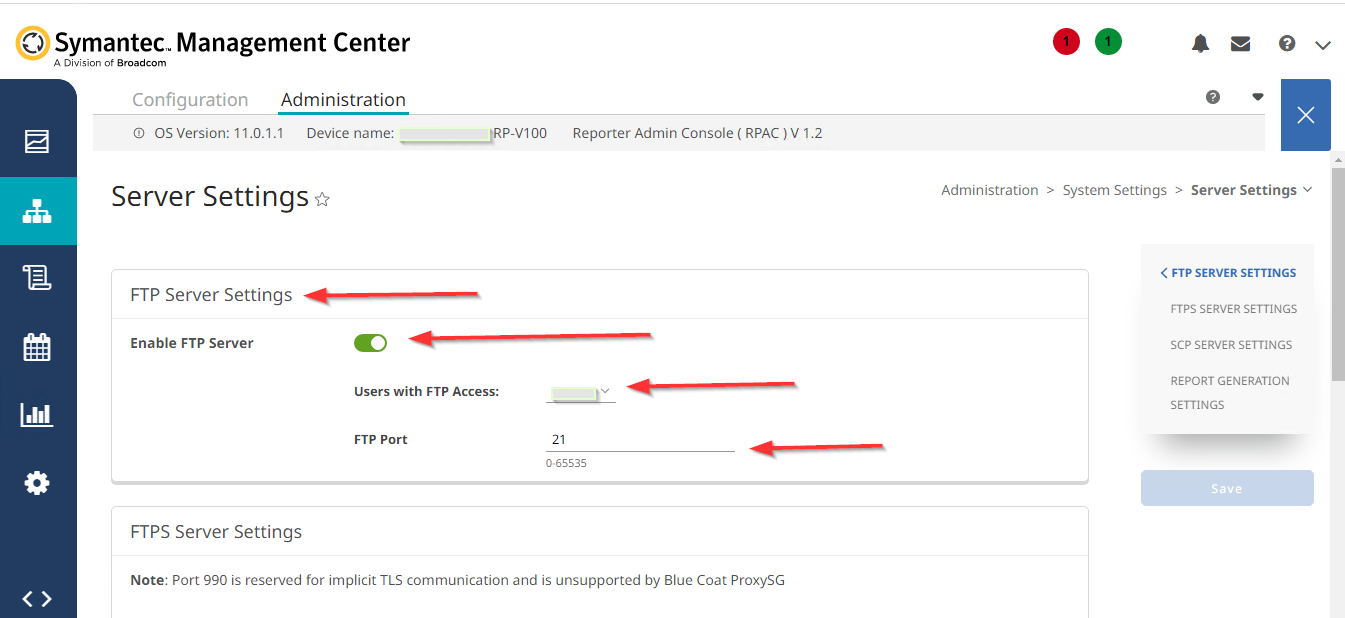
To enable the FTP server
- From Administration> System Settings> Server Settings
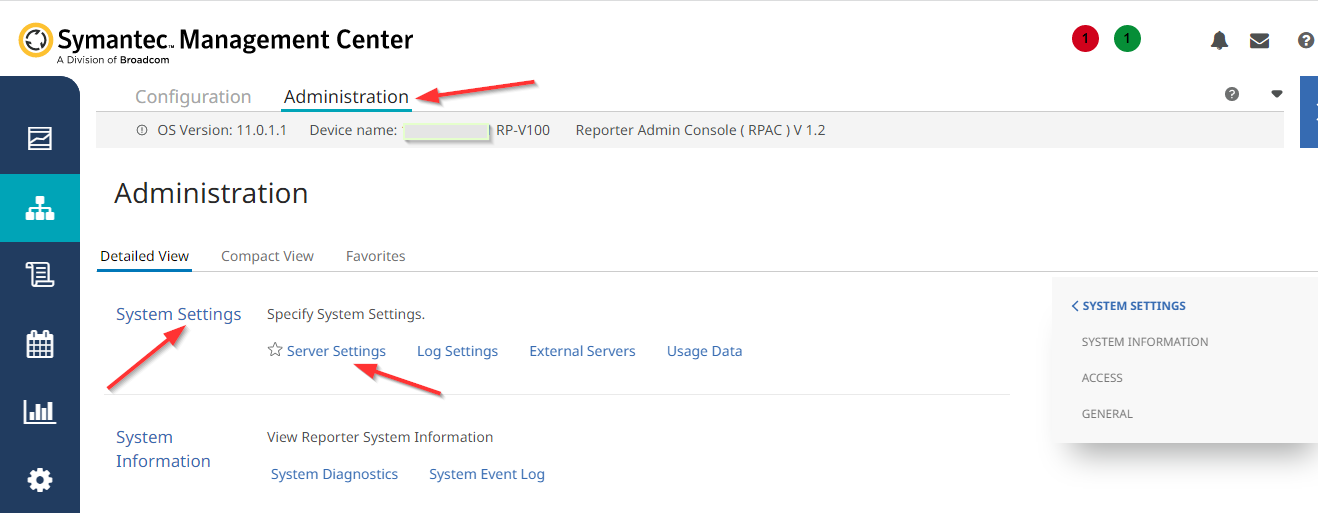
- FTP Server Settings
- Enable FTP Server
- Users with FTP Access
- FTP Port
- From Administration> System Settings> Server Settings
To Create Databases and logs
- Configuration> Data Settings> Databases & Logs
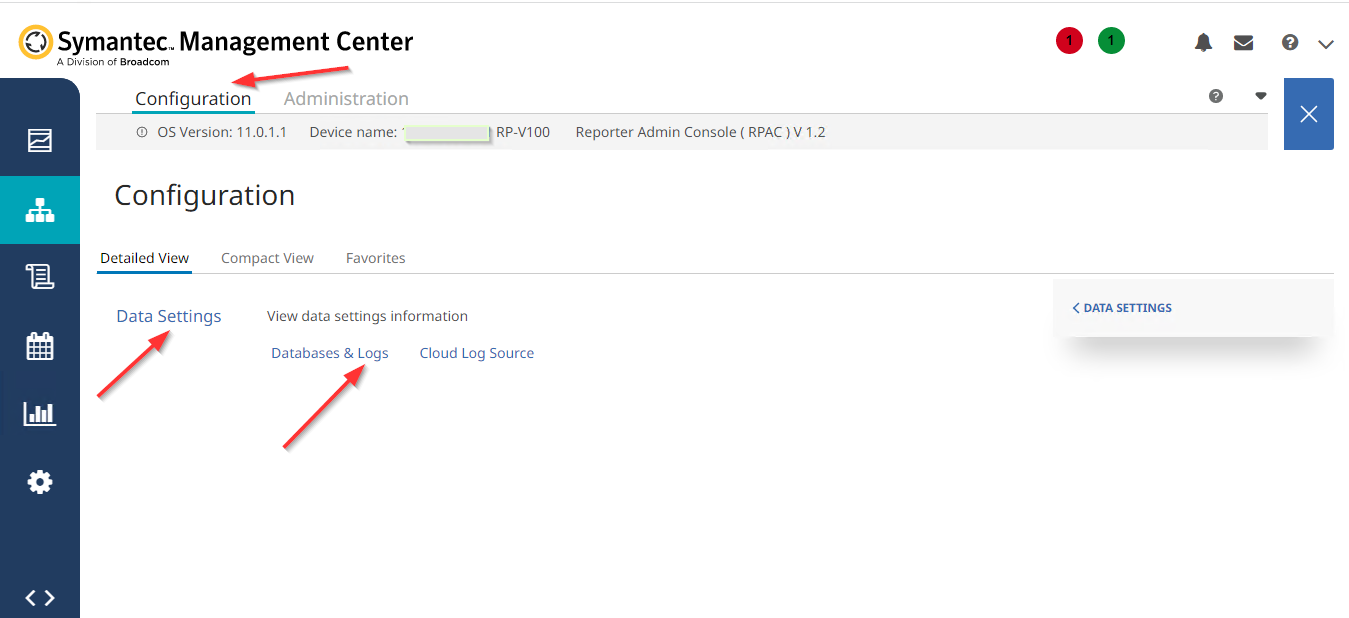
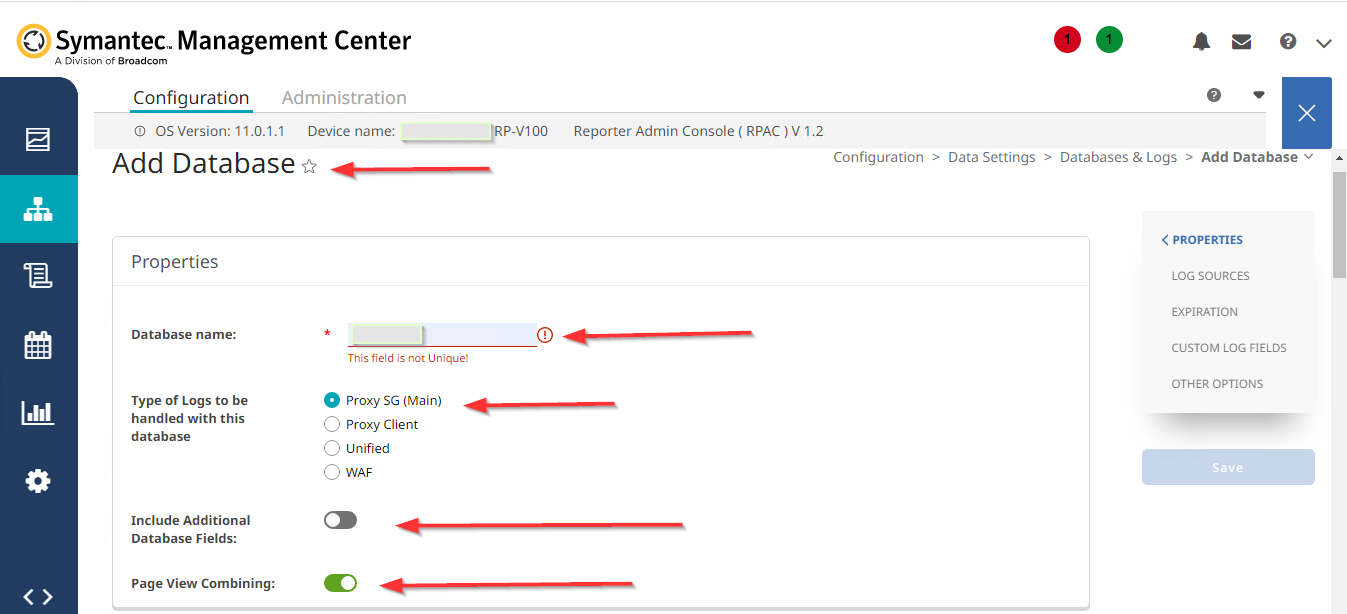
- Databases> Add Database
- Database name
- Type of Logs to be handled with this database
- Include Additional Database Fields
- Page View Combining
- Configuration> Data Settings> Databases & Logs
Add Log Sources
Note: You can configure each Log Source to use this default at different times.
- Log Source name
- Type of Log Source
- FTP Server Source: If the appliance is configured to upload access logs to a dedicated FTP server.
- Local File Source: If you configured the appliance to upload access logs directly to the appliance.
In this case, we will choose the “Local File Source”
- Directory Path
to the log files on this Reporter appliance. - File Pattern
The default value is an asterisk (*). For this Reporter processes all files with the .log or .log.gz extensions (and ignores all other extensions). - Process Subdirectories
If the access log directories contain multiple sub-folders, select Process Subdirectories to ensure that all content is processed.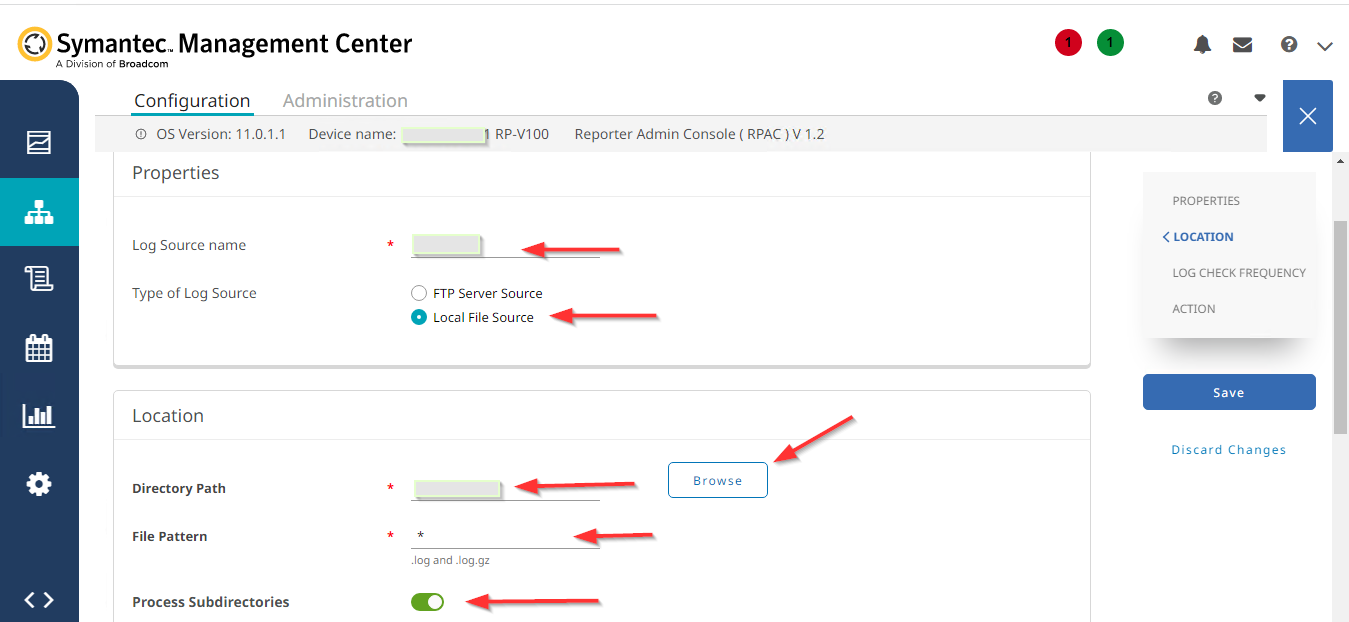
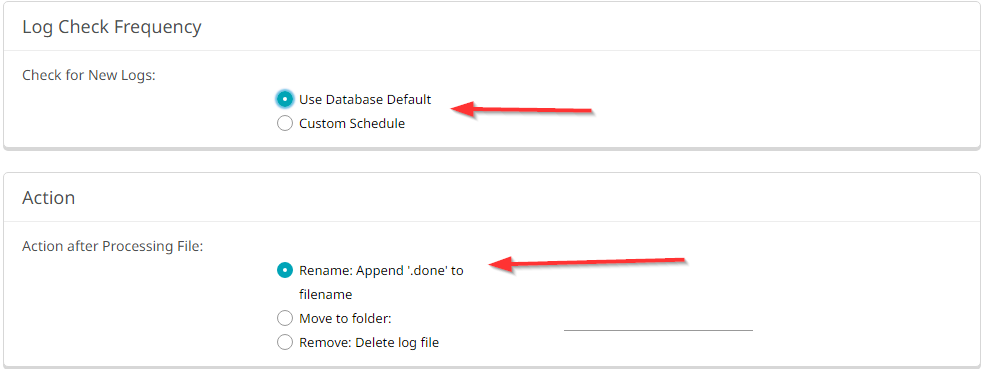
- Check for New Logs
Specify the time to elapse before the Reporter checks for unprocessed logs, use the Database Default, or set a Custom Schedule. For example: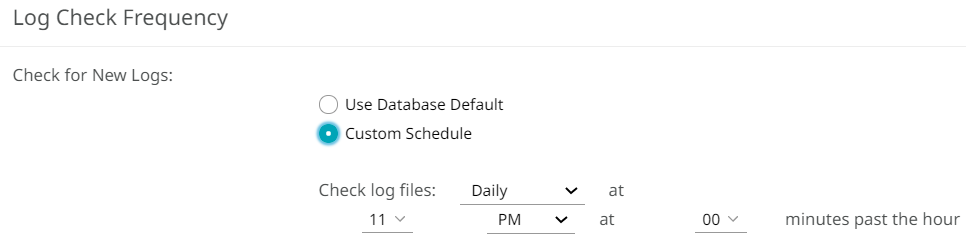
- Action after Processing the File
Specify the action Reporter will take after processing a log file or after the Reporter adds the data to the database. - Rename Append '.done' to the filename: Reporter appends .done to the existing .gz or .log suffix and leaves the file on the server.
- Move to folder: The reporter moves the log files to the specified directory.
- Remove: Delete log file: The reporter deletes the log files from the FTP server directory.
- Expiration
Specify how long data will remain in the database. The reporter purges data from the database at the specified dates and times.
Note: Reporter expires a database based on the amount of time since the last processed log entry, not on when the database was created.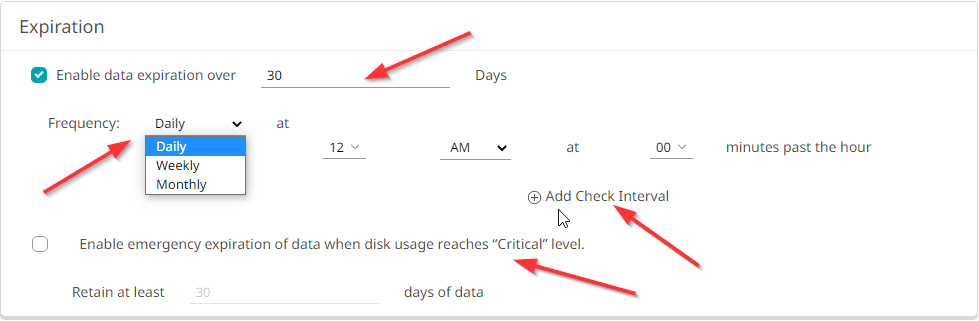
- Custom Log Fields
If you defined custom log fields in Reporter and want to include one in the database, select it in the Custom Log Fields section.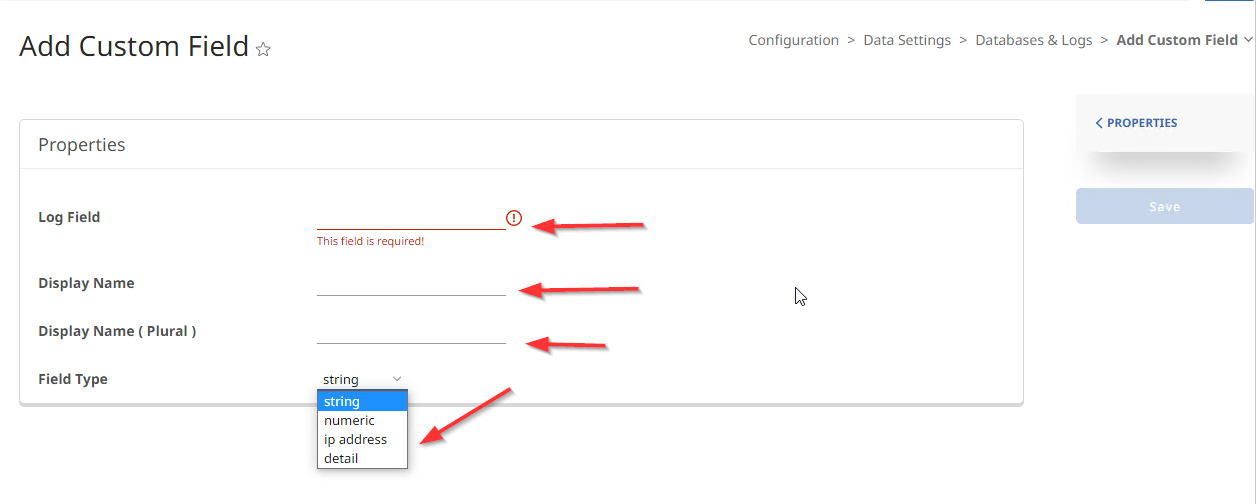
- Other Options
Specify any Cost Calculations and Report Generation Limits.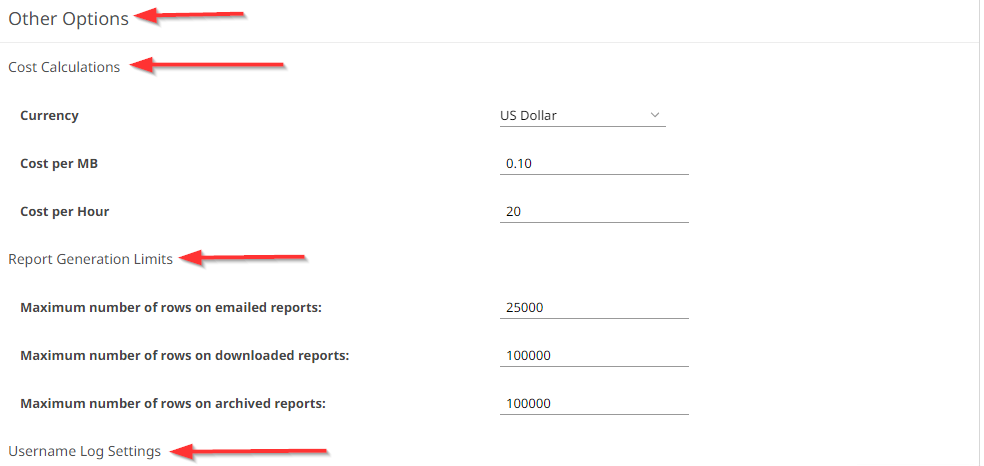
5. Navigate to ProxySG
to enable uploading logs to the Reporter
- Open proxy VPM
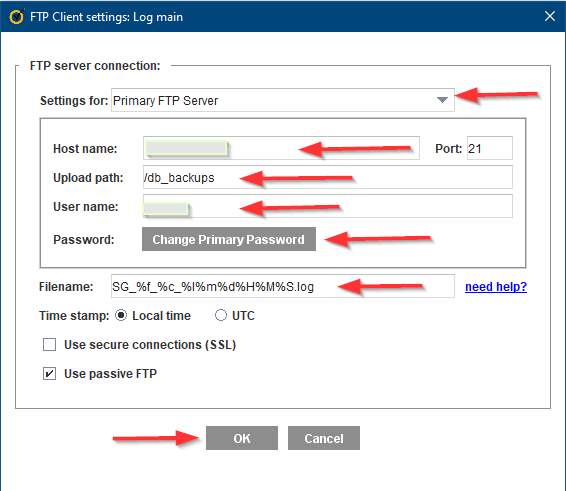
- Configuration> Access Logging> Logs> Upload Client> Settings

- FTP Server Connection
- Hostname(Reporter ip)
- Port ( Same port as a reporter)
- Upload path ( same path as a reporter)
- User name
Note: User that created to use with FTP server on reporter - Password
- File name
- Ok
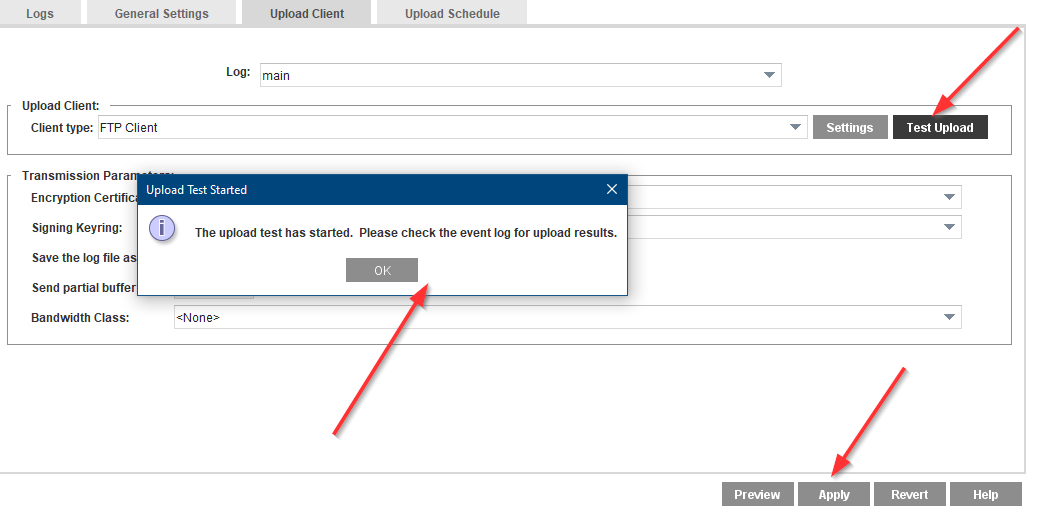
- Apply> Test Upload
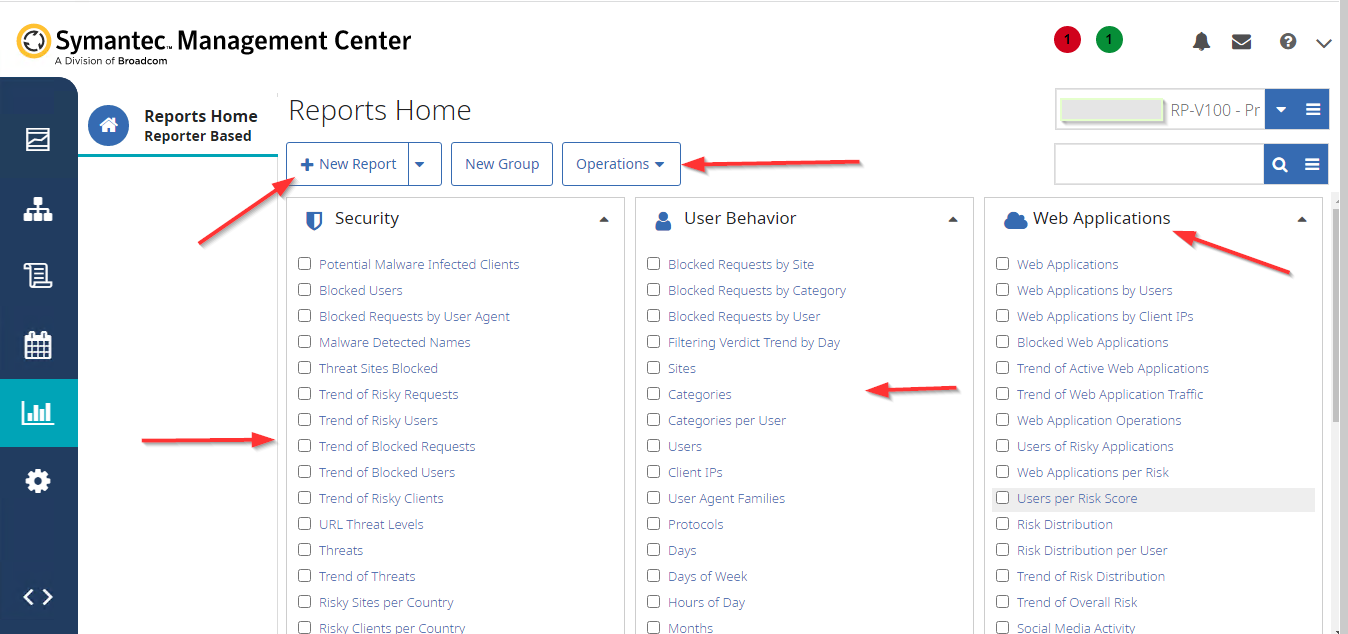
6. Navigate to Management Center
to generate the reports you want
- REPORTS> Reporter

- Choose from Reports Home any time of report you want, Create a new one, and Schedule it