In this article, We will Configure Squid Proxy on OPNSense
Setup Caching Proxy (Squid):
- log into OPNSense and then follow these steps:
- Click Services > Web Proxy > Administration.
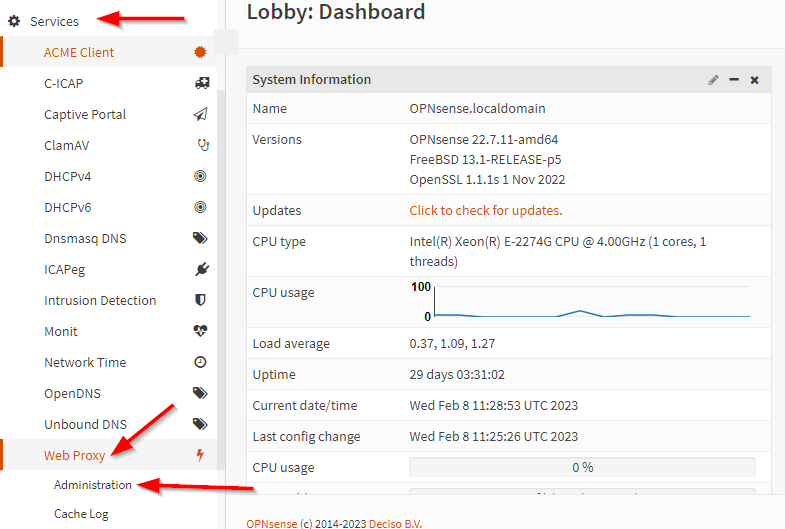
- Click Services > Web Proxy > Administration.
- In General Proxy Settings Tab
- Check Enable Proxy
- Apply

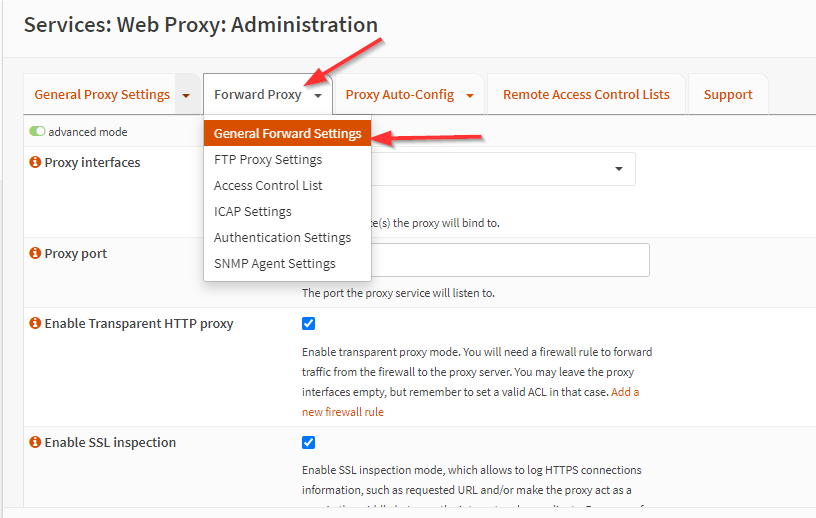
- In Forward Proxy Tab
- Choose General Forward Settings from the small arrow
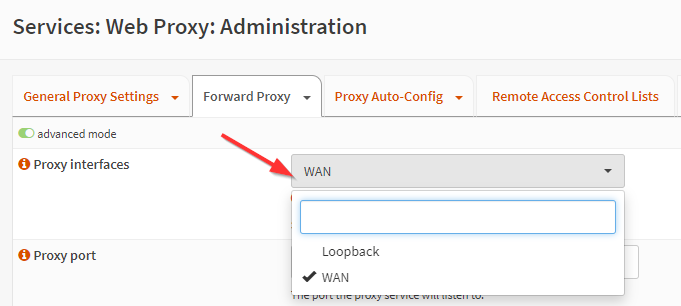
- Proxy interfaces Choose The Interface that you want to enable the proxy on
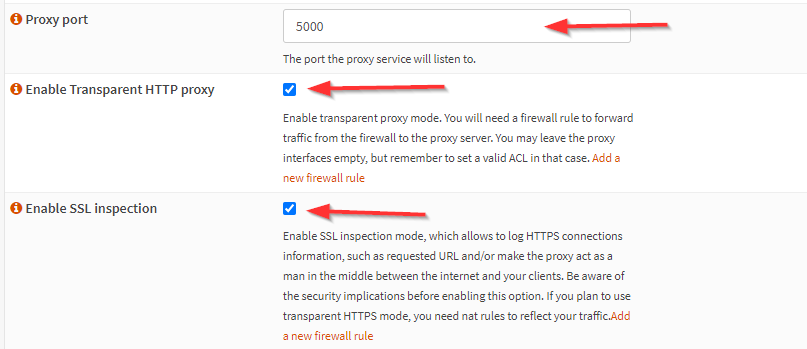
- Proxy port Write the port number that you want to run the proxy on
- Enable SSL inspection
- CA to use Choose the Certificate Authority that you want to use with this proxy.

So, we have to make the Certificate Authority first
To make the CA navigate to:
- System > Trust > Authorities
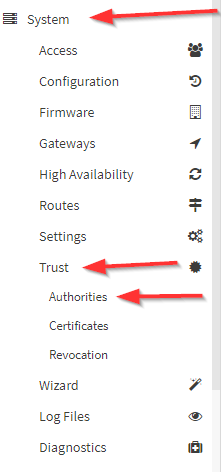
- Click on the Plus(+) sign

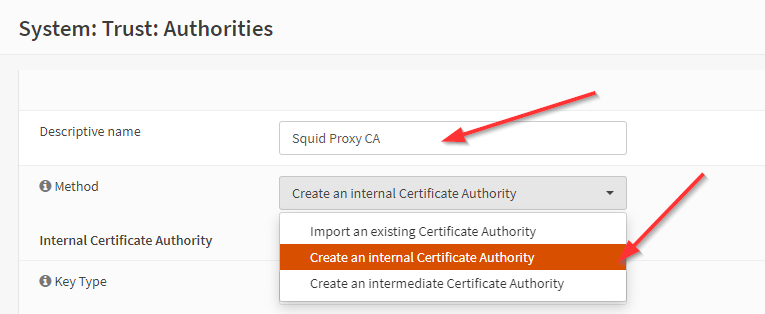
- Write the Descriptive name of the Certificate as you want.
- Choose the Method of the Certificate in this example we will use (Create
an internal Certificate Authority)
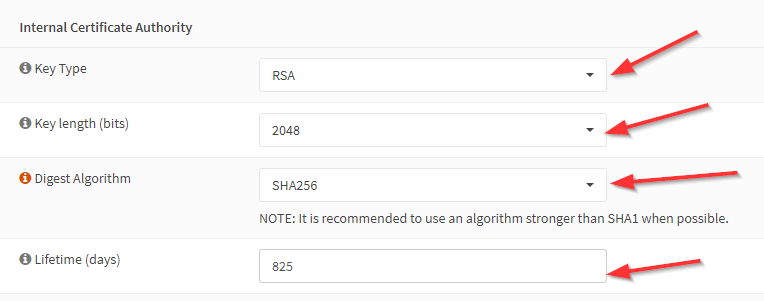
- Internal Certificate Authority (Edit Internal Certificate Authority information as you want)
- Key Type
- Key length (bits)
- Digest Algorithm
- Lifetime (days)
- Internal Certificate Authority (Edit Internal Certificate Authority information as you want)
- Distinguished name (Edit Distinguished name Information as you want)
- Country Code
- State or Province
- City
- Organization
- Email Address
- Common Name

- Save
- You must see your certificate like this after saving

Now go to complete step 3:
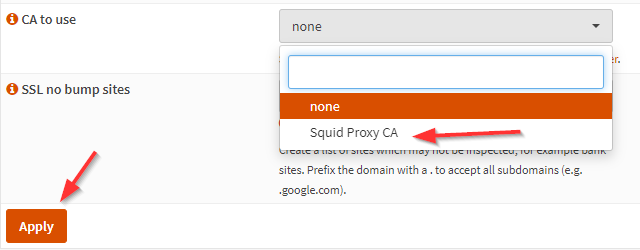
- CA to use Select the Certificate that you created then apply.
- Apply
From the Forward Proxy tab
- Choose Access Control List (Access Control List to add allowed subnets, add blacklist domains, and whitelist domains and IPs)

- Allowed Subnets (Allowed Subnets as you want )
Note: this IP will allow all IPs and Subnets (0.0.0.0/0)
- Allowed Subnets (Allowed Subnets as you want )

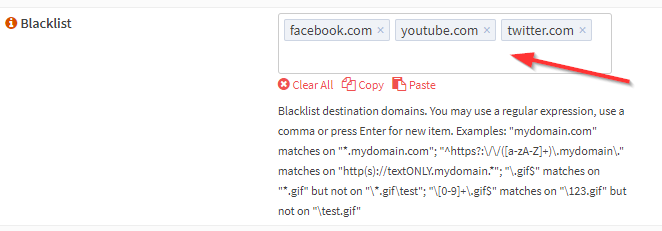
- Blacklist (Add domains that you want to block users from visiting)
I will add (facebook.com, youtube.com, and twitter.com) to this test.
- Blacklist (Add domains that you want to block users from visiting)
- Click advanced mode if you can change any other information you want

- Apply
Now we will Change Proxy Settings on the Browser
- . Download the CA that you created before
- Navigate to System > Trust > Authorities > click the download sign

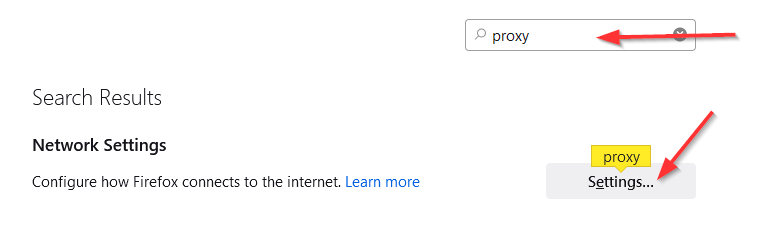
- Go to the browser that you will enable Proxy on in this example we will use "Firefox"
- Open Firefox then click this sign then "Settings"

- Write in the search box "proxy" then click "Settings"
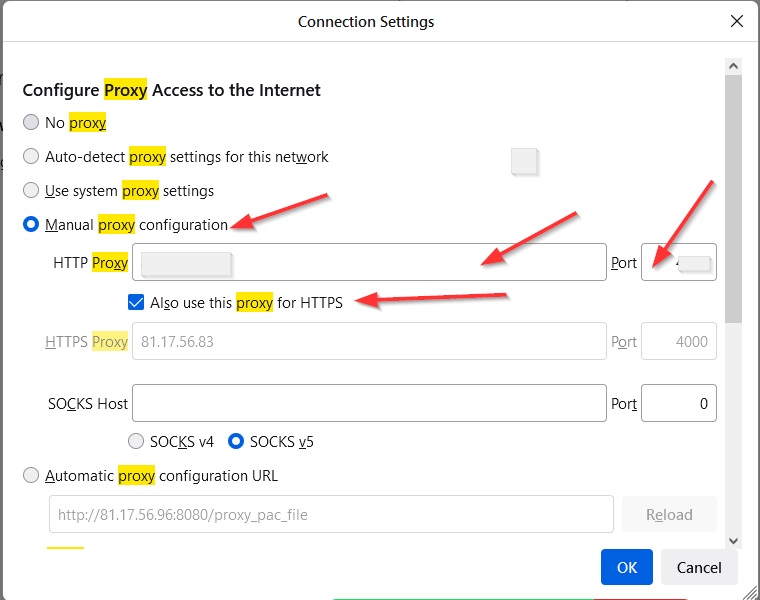
- Select "Manual proxy configuration" then write HTTP Proxy IP and Port
- Select the Also use this proxy for HTTPS.
- OK
- Add the Certificate Authority
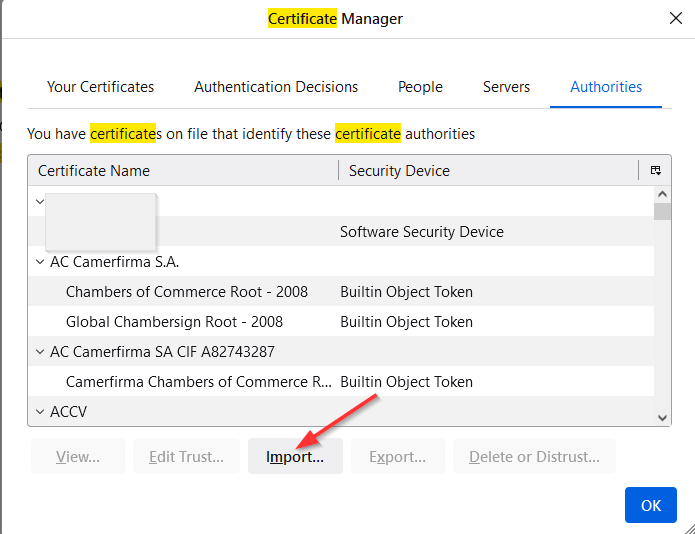
- Write in the search box " Certificate" and click View Certificates
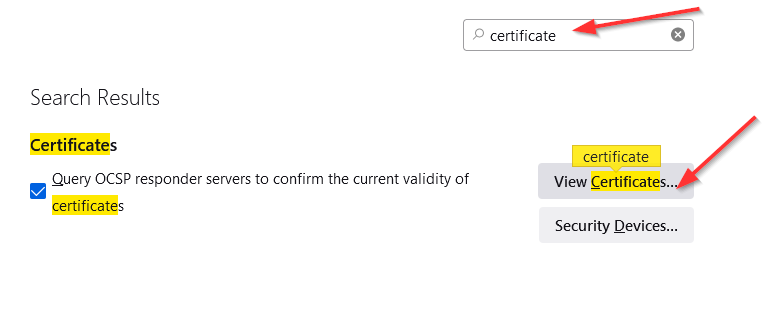
- Click Import and choose the Certificate that you recently downloaded then click Open
- Select "Trust this CA to identify websites" and "Trust this CA to identify email users".
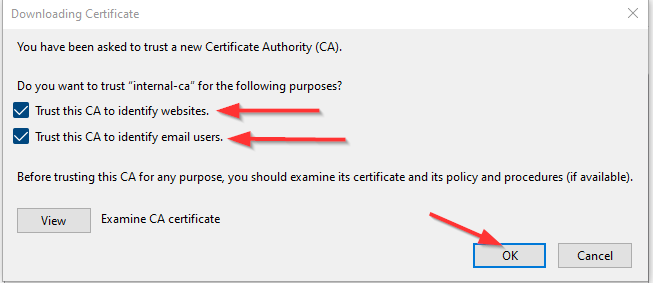
- OK, OK
Now we will check if the proxy runs Correctly as we want or not
- Do normal browsing to check that is running
- Browse "Facebook.com" as we add it to the blacklist you will not be able to access
the site

- Check if the CA is enabled
- Click the "Lock" sign then click "Connection Secure" You have to see your CA name

Finally, those are the Steps that you should follow to enable simple Squid Proxy configuration on OPNSense.